Basic Langolier Fiber Laser Troubleshooting Guide
I believe that anything that is made can and will fail one day. I’m dismayed when I see advertising...
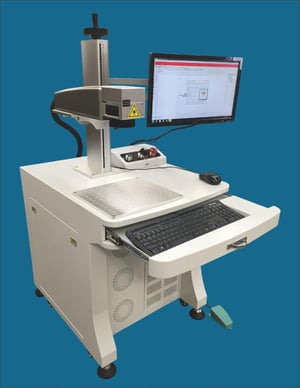
This post is just a brief description of how to use a fiber laser marker (hopefully a Jimani system) and is only intended to “jump start” a new user. It assumes that the marker has a steered beam (galvo driven) optical system.
 Before you begin to mark something, first you have to define three things:
The “what you are going to mark” and the “where you are going to mark it” have to do with the specific laser marking software that you are using.
Jimani lasers use Leopardmark or Prolase Laser Marking Software exclusively and information about questions 1 and 2 above can be learned by viewing the Leaopardmark/Prolase 7 Fiber Laser Marking software tutorial shown below.
New users are generally most challenged by number 3- “How are you going to mark it”. To address that question, one needs to know a bit about how the fiber laser and the marking system work.
If you don’t know anything at all about laser marking then it might be useful to read What is Laser Marking?
If you are familiar with laser marking then you probably know that the three most common settings that can be changed to affect how a part is marked are:
1. Speed- This is how fast the laser beam travels over the part being marked. Steered beam systems use scanning galvanometers with mirrors attached to them to move the laser beam through the lens and over surface of the part. The galvos can usually move the laser much faster than the laser has the ability to mark the part appropriately so galvos rarely run at the maximum speed that they are capable of. Galvo manufacturers will give speed specifications that state that the galvo is capable of “hundreds of characters per second”. The problem is that, for most materials, at those speeds the laser does not have enough time on any portion of the part to do any work. Useful speeds depend on the material and the laser power. Speeds of 30-35 inches a second might be fine for removing anodize on aluminum but engraving deeper into metals will be better accomplished at a speed of 5 inches per second and by making multiple passes over the part.
2. Power- The laser can only put out as much power as it is designed for. Generally speaking, more power out of the laser will allow either more material removal or allow the part to be marked at higher galvo speeds. In a Jimani laser marker, power is calibrated in watts. A 20 watt laser can only put out 20 watts. You can put in a larger number in the output power setting but you can only get out what the laser is capable of.
3. Pulse Frequency- Unless you have a CW laser, and you won’t have one of those if your laser is used for marking, the laser puts out pulses of light rather than a continuous beam of light. Each of these pulses has a very short duration and the time of the pulse is measured in nanoseconds.
As the output pulse frequency decreases, the energy in each laser pulse increases. The laser and its associated internal optics have an energy damage threshold and great care is taken to ensure that the output energy is not allowed to exceed the damage threshold of the laser or any of its internal components. Fixed pulsewidth fiber lasers have a damage threshold of about 1mj of energy. A 20 watt fixed pulsewidth fiber laser will approaches 1mj of energy per pulse at a pulsefrequency of about 20 KHz and 20 watts of output power. Because of this, a 20 watt fixed pulsewidth fiber laser is not allowed to work at pulse frequencies lower than 20 KHz.
Remember, output energy increases as pulse frequency decreases. So a 20 watt fixed pulsewidth fiber laser will have the maximum possible energy per pulse at a 20 KHz pulse frequency. Setting the pulse frequency lower than 20 KHz will not result in more energy per pulse because the laser is internally restricted from pulsing at lower frequencies. Typical pulse frequency range for a 20 watt fixed pulsewidth fiber laser is 20-200 KHz. The useful pulse frequency range is something like 20-50 KHz. At pulse frequencies higher than about 50 KHz, there is not enough energy produced in each pulse to do much work. A 50 watt fixed pulsewidth fiber laser approaches 1mj per pulse at 50 KHz pulse frequency and 50 watts of output power and so, it is internally restricted from operating at lower frequencies. The useful pulse frequency range of a 50 watt fixed pulsewidth fiber laser is about 50-80 KHz. Again, above 80 KHz there is just not enough energy in each pulse to do much work. Variable pulsewidth fiber lasers are allowed to operate at lower pulse frequencies although they still have that same 1mj per laser pulse damage threshold.
If a lower pulse frequency is selected on a variable pulsewidth fiber laser, the laser power output is internally reduced so that the energy per pulse cannot exceed the damage threshold. There is no getting around the damage threshold. Its physics.
So, how material marks is a function on how fast the laser beam is moving over the part, how much power the laser is putting out and the pulse frequency that the laser is operating at. Lower speed, higher laser power and lower pulse frequencies result in stronger and deeper marking. Conversely, higher speed, lower laser power and higher pulse frequencies result in weaker and shallower marking.
Since the laser beam is pulsed as it moves over the work, a line drawn by the laser might look like:
oooooooooooooooooooooooooooooooooooooooooooooooooooo
If either the galvo speed is decreased or the output pulse frequency increased, the laser pulses will overlap each other.

This means that each location on the drawn line will be impacted by more laser pulses since those pulses overlap each other. But if the pulse frequency is so high that the energy per pulse is significantly reduced then the net result might be a weaker, shallower mark on the part because of the reduced energy per pulse. There is a tradeoff between the energy per pulse and the number of overlapping pulses. There are other variables that can affect the quality of the mark such as fill density and spot size. Those topics are beyond the scope of a “Getting Started” paper and are best discussed after one has a good understanding of the relationship between speed, power and pulse frequency.