View Examples of Laser Marking and Engraving

- Home
- Applications
What can be marked with a laser and how does one do that?
It would be great if someone could create a “recipe book” that would give specific settings for laser marking any type of material on any type or make of laser marking system. Good luck finding that. Different laser marking systems from different manufacturers can yield different results on the same material for several reasons. Those reasons might include laser wavelength, laser beam quality, focused laser spot size, laser pulse width, pulse frequency range, laser calibration units and marking software capabilities.
Rather than trying to define specific laser settings for specific material types, it might be better to try and understand what effect different laser settings have on those materials.
A few years ago I wrote a couple of articles about laser marking that were published by Photonics Online. If one is new to laser marking, reading those articles might be a good place to start:
With few exceptions, laser marking systems are either 1064 nm fiber lasers or 10,600 nm CO2 lasers. Fiber lasers work on all metals, plated, painted or bare, and a handful of non-metals such as some types of plastics. CO2 lasers work on wood, glass, organic materials, most plastics, and painted surfaces. There is some overlap between laser type and material but, generally speaking, one laser type is far superior to the other for a particular material.
-
CO2 Laser Applications
CO2 laser applications are a bit easier to discuss so let’s start there. Most CO2 marking systems use RF-excited, sealed beam CO2 lasers. These lasers are generally optimized for a 5 KHz pulse frequency and most users never deviate from that. At Jimani we sometimes deviate from that 5 KHz CO2 pulse frequency, especially for glass marking, but most users don’t. Adjusting the laser output power and scanning speed over the work are the primary settings that get changed for CO2 marking. The focused laser spot size is a function of the focal distance of the lens and whether or not a beam-expanding telescope is used. A longer focal distance lens will result in a larger focused spot.
-
Fiber Laser Applications
Fiber laser applications can be a bit more complex to dial in because there are more variables to work with. Typical variable settings include pulse frequency, laser output power, marking speed, and, if your fiber laser has variable pulse width capabilities, pulse width. The settings for one focal length lens might not work at all with a lens of a different focal length. Rather than trying to find that non-existent laser setting recipe book, I think that users are better off understanding what the different laser settings do and how they affect the marking.
-
Pulse Width
If a fiber laser is set for a 50 KHz pulse frequency and a 1 inch long line is drawn at a speed of 1 inch per second then the laser will apply 50,000 individual laser pulses when that line is drawn. Fiber lasers all have a maximum allowable pulse energy limitation in order to prevent internal damage to the laser, typically about 1 mj of energy per individual pulse. A 50 watt fiber laser for example, will achieve that 1 mj of energy at about a 50 KHz pulse frequency. If the marking control software and laser firmware permit pulse frequencies lower than 50 Khz in the laser example above, the energy per pulse will still remain at 1 mj per individual pulse but the average power will decrease because there are fewer pulses per second. If the pulse frequency is increased above 50 KHz, the energy per pulse will decrease per individual pulse although, more laser pulses per second will be applied to the part being marked, and that usually results in more heat being applied to the part. Maximum material removal will happen when the pulse frequency is set so that the laser produces the maximum (1 mj) energy per pulse. The table below might vary somewhat between different models of lasers from different manufacturers but it is generally accurate.
Laser rating Maximum pulse frequency to produce maximum energy of 1 mj per pulse
20 Watt 20 KHz 30 Watt 30 KHz 50 Watt 50 KHz 100 Watt 100 KHz It is important to understand that, regardless of laser power rating, all of them are limited to 1 mj of energy per pulse. A 100 watt laser just puts out 5 times more 1 mj pulses per second than does a 20 watt laser.
The table above applies to fixed pulse width lasers with a pulse width of around 100 ns per pulse. Variable pulse width lasers all come with a chart that provides the optimum frequency for maximum pulse energy for each separate pulse width.
-
Laser Output Power
Controlling the laser output power is a matter of controlling how hard the laser is being “pumped”. Less pumping means less output energy per individual laser pulse. Higher pumping results in more output energy per individual laser pulse until the maximum allowable of pulse energy of 1 mj is achieved.
-
Marking Speed
The speed at which the mirrors on the scanning galvanometers move the laser beam over the workpiece is the marking speed. Faster marking speeds give the laser light less time to do work on the part and slower marking speeds allow more time for the laser to work on the part. There are some practical limits to useful marking speeds. Even though the galvanometers might be capable of moving at very high speeds when marking a long, straight line, most marking applications do not consist of long, straight lines. Most marking really consists of many short lines such as the fill lines in a .25” high letter. For each line that is being marked, the galvos must position the laser beam at the starting point of the line, pause and allow for some settling time, begin to accelerate and draw the line, start slowing down near the end of the line and then come to a stop at the end of the line and reposition to the beginning of the next line. Since most of these lines are going to be very short, no matter how fast the galvos are commanded to move, they can only accelerate so fast before they need to start slowing down again. The useful marking speed on most galvo systems is going to be limited to 40 IPS or so and beyond that marking time will not decrease.
-
Pulse Width
Pulse width can be described pretty easily. Short pulse widths let the laser behave like a scalpel and long pulse widths let the laser behave like a meat cleaver. You will not have much success marking .005” deep into a firearm with a very short pulse width nor will you have much success doing delicate marking on thin film material with a long pulse width.
-
Marking Techniques
Generally speaking, there are three primary marking techniques that can be performed with a fiber laser:
- Ablation
- Engraving
- Stain Marking (Frequently referred to as Annealing)
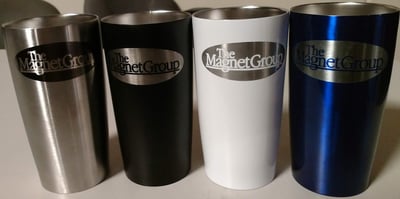
Laser ablation is the removal or vaporization of material from the surface of some material or substrate. Ideally, the laser light is absorbed on the surface of the part and there is minimal penetration into the part. Some examples of ablation marking would be removing anodize from the surface of an aluminum substrate or removing the metallic film on the outside of a piece of coated plastic. In both of these examples, the objective is to achieve a contrasting mark on the surface of the part without engraving it (as seen below).
The laser settings that one might use for ablation marking are not the same as one would use for engraving. Faster marking speed (the speed at which the scanning mirrors are moving the laser beam over the surface of the part) and lower laser output power are typically what are used for ablation marking. If too much laser power is applied for too long, then the result will be material removal from metal substrates and melting into plastic substrates. Some materials are so sensitive that shorter laser pulse widths are necessary. The pulse width is the amount of time that the laser is on for each laser pulse. Remember, the laser marks lines by making a series of overlapping pulses rather than putting out a continuous beam of light. Variable pulse width fiber lasers allow control of the time of each laser pulse and are capable of producing very short laser pulses. Since power is equal to energy/time, shortening the time of each laser pulse can increase the peak power applied to the surface of the material by the laser while decreasing the time that the energy from the laser is applied to the material. The combination of high peak power and short pulse width is ideal for ablation-type marking.
I don’t mean to suggest that variable pulse width fiber lasers are necessary for ablation marking on all materials. A fixed pulse width fiber laser will provide a laser pulse width of 100-120 nanoseconds which will handle the large majority of ablation applications as well as provide a long enough laser pulse width for other marking types.
 Laser Engraving– Some products or applications require that the marking goes deeper into the material. This is normally limited to metal substrates as engraving deeper into plastic substrates usually results in an unacceptable amount of melting. Deeper laser engraving is useful when the surface of the part is subject to wear or abrasion or if the engraved mark requires color filling. Some applications, such as firearms marking, have a depth specification in order to make the marking difficult to remove.
Increased laser power and lower marking speeds are the trademarks of deep laser engraving. Our experience at Jimani is that deeper laser engraving is best accomplished with marking speeds of about 5-10 inches/second using multiple passes in order to remove thin slices of material until the desired depth is achieved. Using very slow marking speeds in order to remove a lot of material in a single pass will result in a slaggy bottom in the trough of the engraving and an accumulation of slag at the edges of the engraving. Multiple laser passes with different fill angles at higher speeds allow for more material removal and cleaner troughs and edges. More laser passes result in deeper marking until the laser beam begins to go out of focus or the vaporized material can’t escape from a very narrow trough.
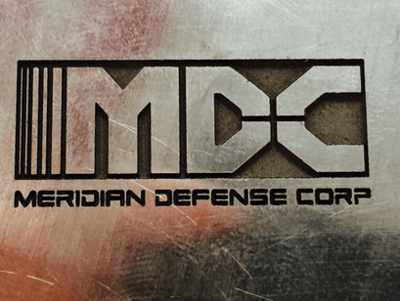
I began an earlier article by stating that laser marking is like burning leaves with a magnifying glass. If the leaf is not at the focal point of the magnifying glass lens, then there is not a high enough concentration of sunlight to set the leaf on fire. The same thing is true with laser engraving. If a substrate is far enough away from the focal point of the lens of a laser marking/engraving system, then there is not a high enough concentration of laser light to burn away or vaporize material. That distance defines the depth of focus of the laser marking system and it is a combination of the focal distance of the lens and the quality of the laser beam going into that lens. Engraving depths into metal of say .010-.015 inches is achievable with a single lens positioning but beyond that, it would be best to reposition the lens a bit. I’ve engraved .250 inches plus into a steel substrate (as seen below) but that was accomplished by repositioning the lens many times and it took a lot of time. From a practical standpoint, a fiber laser system designed for general purpose marking and engraving is probably the wrong tool for this.
The limitation for deep engraving into metal is usually the width of the engraving. Imagine that the engraving consists of a line of text with .060 inch high characters. The line width of each character is going to be pretty narrow (say .010 inch or so) and as the engraving gets deeper, the newly vaporized material tends to collect on the sidewalls of the engraved trough rather than be blown out of the trough. Laser cutting systems address this issue by directing high-velocity jets of air through nozzles placed near the center of the focusing lens but this technique doesn’t work with the F theta lenses used in steered beam laser marking systems. The practical limit for deep engraving narrow line widths is .020 inches or so.
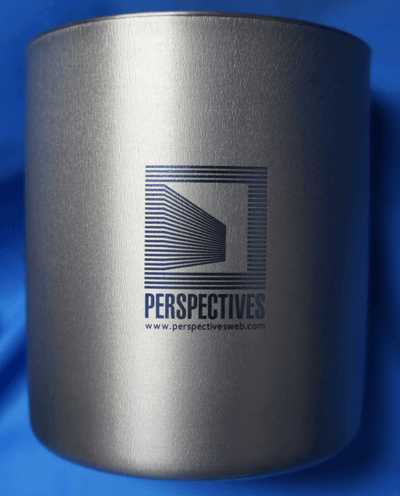
 Stain Marking– If the spot size of the focused laser beam is made large enough on certain material types, the laser will heat the material rather than ablate it or engrave it away. With materials like stainless steel, titanium, and hard chrome, the heat from the laser beam will cause an oxide layer to form. Multiple passes of the laser over the material will make the oxide layer darker or allow for subtle color variations. If a variable pulse width fiber laser is used, experimenting with laser pulse width, power, marking speed, fill density and pulse frequency can produce a variety of color shades ranging from black, blue, red, and green. Color marking sounds fascinating but it comes with its own set of challenges. Different materials can produce very different results and there are endless combination settings that can be adjusted.
Most stain marking is simply done to get a non-penetrating dark mark on the suitable materials that were mentioned above. Stain marking is attractive, permanent, and non-contaminating. It is a technique frequently used in the identification of medical instruments or tools because no inks, paints, or chemicals are used. Stain marks have microns of penetration into the surface of the substrate and, although the marking won’t come off with time or handling, it can be sanded or abraded off. It is not a good technique for parts that are marked on “wear” surfaces.
The secret to good stain marking is having the proper focused spot size from the laser. Most fiber laser marking systems have beam delivery optics that are designed to focus the laser to a very small spot; too small for stain marking. One technique for increasing the laser spot size is to simply move the substrate away from the focal point of the lens slightly. This technique works well for flat surfaces although “out of focus” can be a bit subjective. The out-of-focus technique doesn’t work well with round or radiused parts. As the defocused beam moves around the radius, it either begins to come back into focus or gets further out of focus. The ideal solution is to have the laser beam focus on the correct spot size at the focal point of the lens. Using this technique, the laser will maintain the correct spot size throughout the depth of focus of the lens. At Jimani we achieve this optically by passing the laser beam through a reversible beam expander before it goes to the focusing lens. By “de-collimating” the laser beam we can increase the size of the focused spot as well as increase the depth of focus through the lens. This adds a bit of expense to the system but that expense is fully justified by the improved stain mark performance.
Color Marking- Marking in color is a matter of controlling the thickness of a stain mark oxide layer and is best accomplished with a variable pulse width MOPA laser. There are many pretty pictures of color-marked parts on the internet but there is no information about the 5 or 6 hours of setup time that went into dialing in the settings for that part and the 5 or 6 hours that will be involved in the next part. Color marking is a temperamental and laborious process. We don’t do any color marking in the job shop part of our business because no one is willing to pay for all of the setup time involved in creating a color mark on a part.
Use the handy matrix below to locate examples of laser marking and engraving.
| Material | Mark Type | Mark Style | Industry | Laser System | Laser Components |
Laser Services |
|
|
||||||