3D Medical Manufacturing Improves Laser Marking Speed
3D Medical Manufacturing, located in Riviera Beach, FL and founded in 1994, is a Contract...
 Part of Jimani's business is contract job shop marking. We frequently are asked to mark parts with unique shapes that present fixturing problems when we try to present them under the lens of the laser marker in a repeatable manner. Having custom fixtures made can be an expensive and time consuming task.
We frequently find ourselves clamping bits and pieces of metal together to make a fixture that would make Rube Goldberg proud. I have held a quiet fascination for 3D printers over the last couple of years. Having no firsthand experience with them, I speculated that a 3D printer capable of making useful fixtures for our job shop needs would be extravagantly expensive.
 The subject of 3D printers came up over lunch with one of Jimani's job shop customers and I was informed that I might be able to do what I wanted with a modestly priced MakerBot 3D printer. Taking his advice, I contacted MakerBot and was talked out of buying their higher end
model in favor of the more basic Replicator 2. Within an hour of the delivery of the MakerBot, I was building models from some of the stock designs provided with the printer.
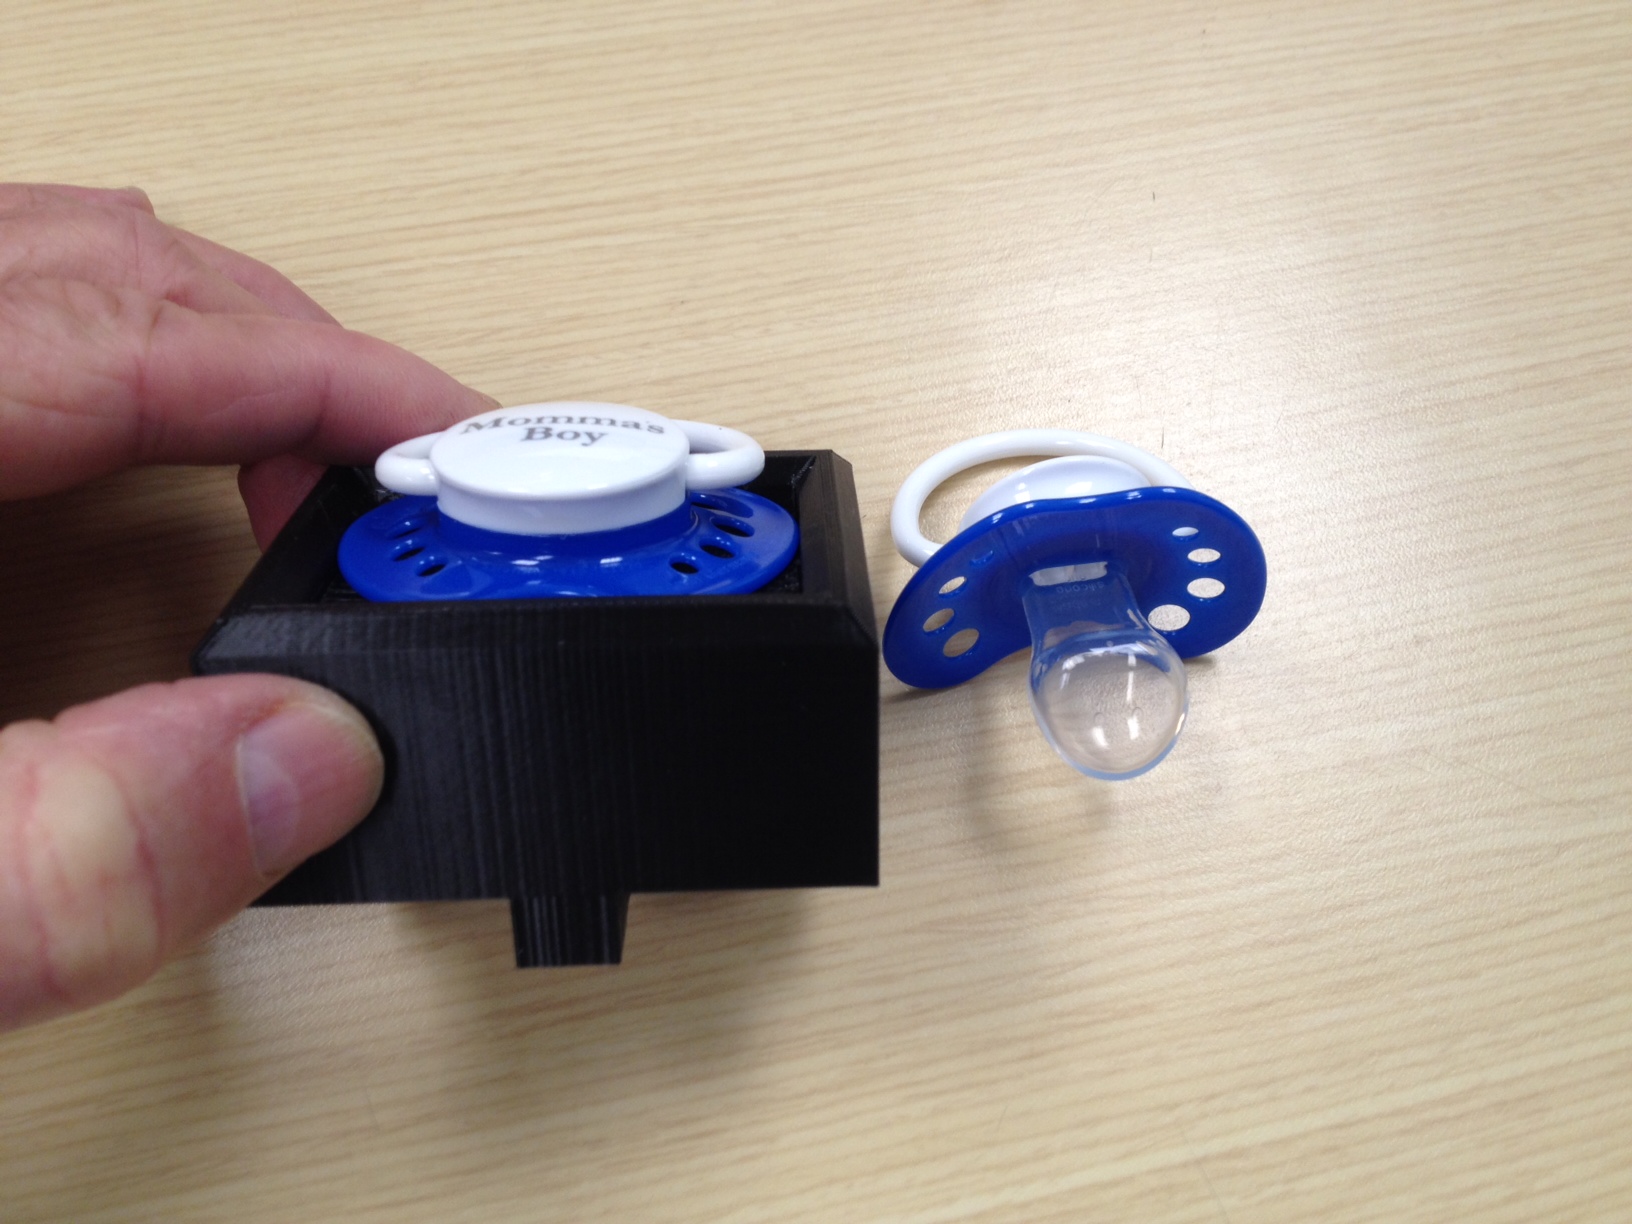
Since I have no experience whatsoever with 3D modeling software, that has become my biggest challenge. I'm currently using SketchUp and I believe that it will be sufficient for basic fixtures that we want to make. The pacifier in the photo is representative of an odd shaped part. We designed the fixture in SketchUp and printed it with the MakerBot. Pacifiers locate quickly and accurately in the fixture. The tabs on the bottom of the fixture allow it to drop into and located on the slots of the T-slot X-Y table on the marker.